Implementing the Polling Consumer Pattern using Azure Logic Apps
Introduction
When implementing integration projects, it’s quite common that upstream systems don’t have the capabilities to push messages to downstream systems, or that due to different constraints or non-functional requirements, the receivers are required to pull for messages from those systems. Gregor Hohpe describes in his book “Enterprise Integration Patterns” the Polling Consumer Pattern, in which a receiver is in charge of polling for messages from a source system. In this pattern, the receiver usually polls for messages with an incremental approach, i.e. polling only for changes from the source system; as opposed to getting a full extract. In most of these scenarios, the provider system does not keep any state on behalf of the receiver; thus, it is up to the receiver to keep a state which allows it to get changes since the previous successful poll.
Azure Logic Apps provides many trigger connectors which already implement the Polling Consumer Pattern out-of-the-box. For example, the Salesforce adapter, can trigger a workflow when a record is created or modified; the SharePoint adapter can initiate a workflow when a file or an item is created or modified; and the Gmail adapter can start a workflow when an email arrives. All these triggers work on a recurrent basis, e.g. every 5 minutes. For all these triggers, the Logic App adapter has to keep a trigger state or polling watermark which allows the connector to get only changes since the last poll. For example, the Gmail connector has to know if there are new emails since the last time it executed a poll. This trigger state or polling watermark should work even if we temporarily disable the Logic App. Even though there are many trigger connectors that make our life very easy, there might be scenarios in which a polling trigger connector is not available for a particular API or system. For example, what if we need to poll for changes from an Oracle database, from a custom API, or from an Atom feed? In this blog, I will show how to implement a custom Polling Consumer Pattern using Azure Logic Apps for those scenarios in which a trigger connector is not yet available.
Scenario
To illustrate the implementation of the Polling Consuming pattern, I will implement a fictitious scenario in which ‘New Hire´ events in an HR System are used to trigger other processes, e.g. identity and workstation provisioning. You might imagine that the end-to-end scenario could be implemented using the Publish-Subscribe Pattern. That’s true, however, on this blog I will focus only on the Polling Consumer interface on the Publisher side.
The HR System of my scenario provides an Atom feed for polling for updates. This Atom feed is exposed as a RESTful API endpoint and requires two query parameters: ‘updated-min’ and ‘updated-max’. Both parameters are date-time in an ISO 8601 UTC format (e.g. yyyy-MM-ddTHH:mm:ss.fffZ). The lower bound (updated-min) is inclusive, whereas the upper bound (updated-max) is exclusive.
Even though my scenario is using a date-time polling watermark, the same principles can be used for other types of watermarks, such as Int64, base64 tokens, and hashes.
Coming back to my scenario, let’s imagine that my Logic App is to be run every 10 mins, and I start it on the 1st of May at 8 AM UTC time; I would expect to send from my Logic App to the HR System http requests like the following:
- https://hrsystem/atom/employee/newhire?updated-min=2017-05-01T08:00:00.000Z&updated-max=2017-05-01T08:10:00.000Z
- https://hrsystem/atom/employee/newhire?updated-min=2017-05-01T08:10:00.000Z&updated-max=2017-05-01T08:20:00.000Z
- https://hrsystem/atom/employee/newhire?updated-min=2017-05-01T08:20:00.000Z&updated-max=2017-05-01T08:30:00.000Z
The first request would return New Hire events that occurred between 8:00 AM and just before 8:10 AM. The next one from 8:10 to just before 8:20, and so on.
Components
To implement this pattern, I will use:
- A Logic App, to implement a custom Polling Consumer Pattern workflow.
- An Azure Storage Table to persist the polling watermark.
- An Azure Function to extract the current polling watermark.
- An Azure Function to update the polling watermark after the poll.
Show me the code!
After describing the scenario, let’s start having fun with the implementation. To implement the pattern, I will follow the steps below:
- Create an Azure Resource Group
- Create an Azure Storage Account, create a Table, and populate the Table with my Polling Watermark
- Create an Azure Function App
- Develop and deploy the Azure Functions which will allow me to retrieve and update the Polling Watermark
- Develop the Azure Logic App
Each step is described in detail as follows,
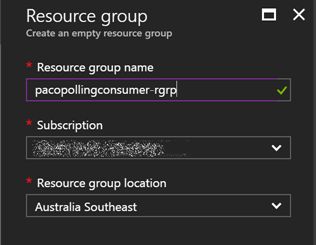
1. Create an Azure Resource Group
You might already have an Azure Resource Group which contains other resources for your solution. If that’s the case you can skip this step. I will start creating a new Resource Group for all resources I will be using for this demo. I’ll name it ‘pacopollingconsumer-rgrp’
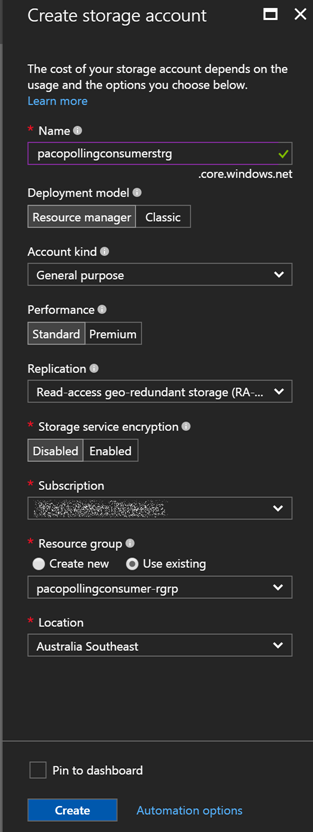
2. Create an Azure Storage Account, create a Table, and populate the Table with the Polling Watermark
Once I have my Azure Resource Group, I’m going to create an Azure Storage Account. I’ll use this Storage Account to create a Table to persist my polling watermark. I want to create a framework that can be used for more than one scenario; whether it’s polling changes from different entities from the same source system, or from more than one source system. So, I’ll prepare my table to handle more than one entity and more than one source system. I’ll name the table ‘pacopollingconsumerstrg’ and use the default settings.
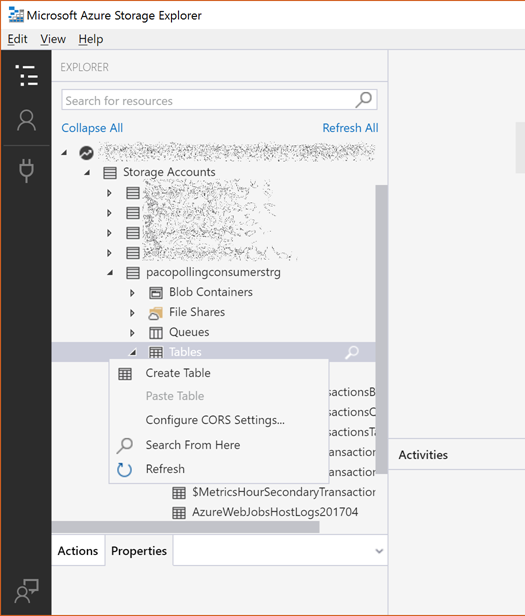
Once I’ve created the Storage Account, I’ll create a table. I’ll use the Azure Storage Explorer for this. Once, I’ve downloaded it, I will open it and add my Azure Account by signing in to Azure.
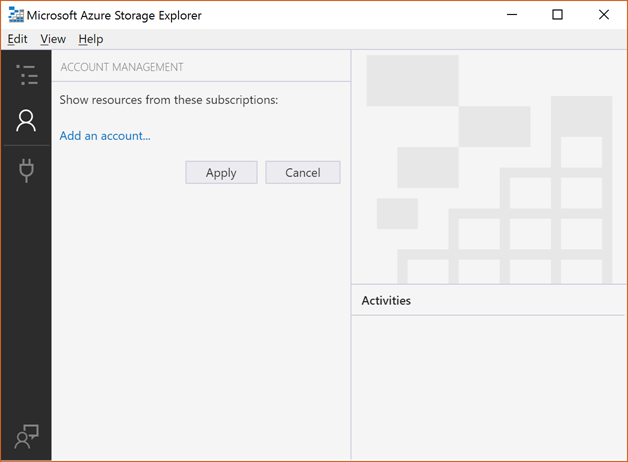
After signing in, I select my subscription. Then, I should be able to see all my existing Storage Accounts
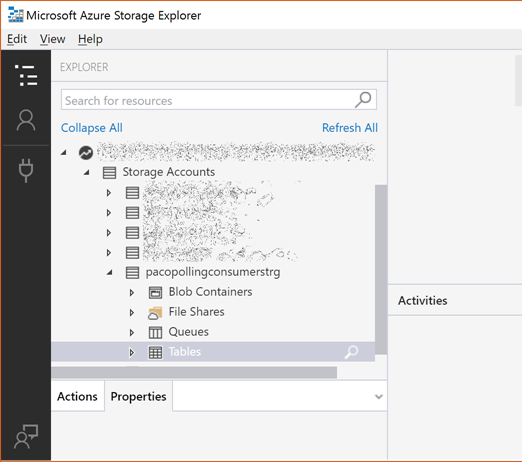
I create a new Table by right clicking on the Tables branch
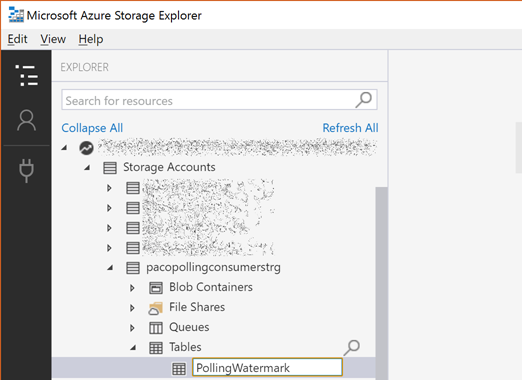
I’ll name the new Table ‘PollingWatermark’
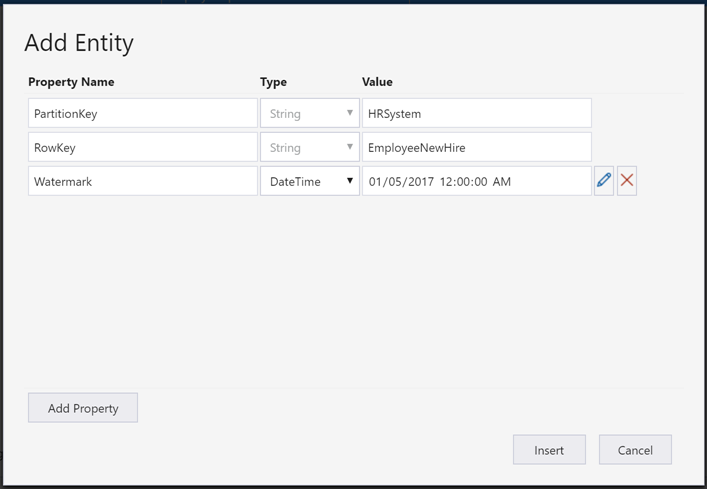
Once the Table has been created, I’ll add a new Entity

As mentioned above, I want to be able to use this table to handle more than one entity and more than one source system. I’ll use the Table PartitionKey to store the Source System, which for this demo I’ll use ‘HRSystem’, and the RowKey to store the Entity, which will be ‘EmployeeNewHire’. I will create a new column of time DateTime to store my Watermark, and I will set my initial value. Bear in mind that the Azure Storage Explore works with local time, however, the value will be stored in UTC.
Cool, now we have our Azure Table Storage ready :)
3. Create the Azure Function App
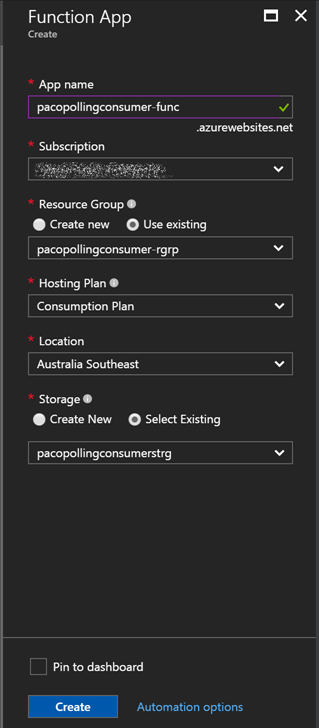
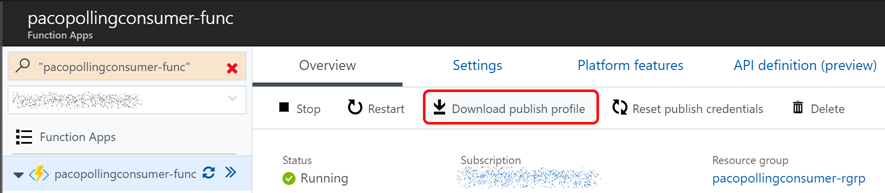
At the time of writing this post, there is no Logic App connector for Azure Table Storage. There is already a user voice for it here, and if you want it, I would suggest you to vote for it. (I already did ;) ) In the absence of a Logic App connector for Azure Storage Table, we will be using an Azure Function App for it. I’ll create an Azure Function App called ‘pacopollingconsumer-func’ on my resource group, using the recently created storage account for its logs, and will use the consumption plan option, which is priced based on execution, as explained here.
Once I’ve created my Function App, I’ll download the publish profile which I’ll be using later to publish my functions.
4. Develop and Deploy the Azure Functions
Even though you can author your Azure Function from the portal, I really like the option of building and test my code locally with all the advantages of using Visual Studio. At the time of writing, Azure Function Tooling on Visual Studio supports creating C# Function as scripts (.csx files) on VS 2015 as described here, and creating class libraries on Visual Studio 2015 and 2017 as shown here. The use of compiled libraries brings some performance benefits, and will also make easier to transition to the planned Visual Studio 2017 tools for Azure Functions as discussed here. So, based on the recommendations, I’ve decided to use a class library project. I’ve already developed an Azure Functions class library project to implement this pattern, and made it available on GitHub, at https://github.com/pacodelacruz/PollingConsumer. Even though you might want to reuse what I have developed, I strongly suggest you to get familiar with developing Azure Function Apps using class library projects, as described here.
Some notes in regard to my ‘PacodelaCruz.PollingConsumer.FunctionApp’ project
- In order to run Azure Functions locally, you have to install the Azure Functions CLI available here.
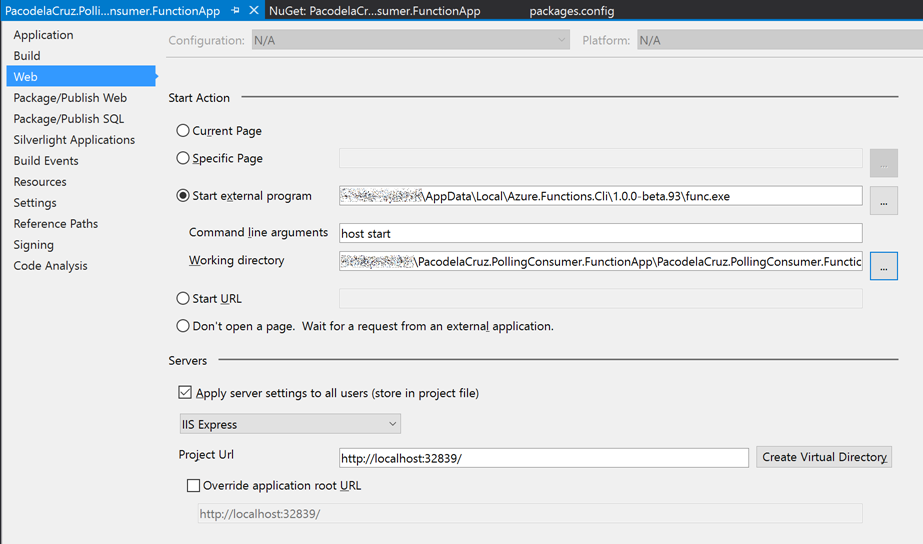
- You will need to update the External program and Working Directory paths in the Project Properties / Web as described here.
-
You might need to get the already referenced NuGet packages:
-
Microsoft.WindowsAzure.ConfigurationManager
-
Microsoft.AspNet.WebApi
-
Microsoft.Azure.WebJobs.Host
-
NOTE: I have found that the Newtonsoft.Json.JsonSerializerSettings on the Newtonsoft.Json version 10.0.2 does not work properly with Azure Functions. So, I’m using the Newtonsoft.Json version 9.0.1. I recommend you not to update it for the time being.
- You might want to update the host.json file according to your needs, instructions here.
- You will need to update the appsettings.json file on your project to use your Azure Storage connection strings.
Now, let’s explore the different components of the project:
- The PollingWatermarkEntity class is used to handle the entities on the Azure Table Storage called 'PollingWatermark'. If you are not familiar with working with Azure Storage Tables on C#, I would recommend you to have a read through the corresponding documentation.
- The PollingWatermark class helps us to wrap the PollingWatermarkEntity and make it more user-friendly. By using the constructor, we are naming the PartitionKey as SourceSystem, and the RowKey as Entity. Additionally, we are returning another property called NextWatermark that is going to be used as the upper bound when querying the source system and when updating the Polling Watermark after we have successfully polled the source system.
Now, let’s have a look at the Functions code:
-
GetPollingWatermark function. This Http triggered function returns a JSON object containing a DateTime Polling Watermark which is stored on an Azure Storage Table based on the provided 'sourceSystem' and 'entity' query parameters in the GET request. The function bindings are defined in the corresponding function.json file.
- UpdatePollingWatermark function. This Http triggered function updates a DateTime Polling Watermark stored on an Azure Storage Table based on the payload in the JSON format sent as the body on the PATCH request. The JSON payload is the one returned by the GetPollingWatermark function. It uses the 'NextWatermark' property as the new value. The function bindings are defined in the corresponding function.json file.
Once you have updated the appsettings.json file with your own connection strings, you can test your functions locally. You can use PostMan for this. On Visual Studio, hit F5, and wait until the Azure Functions CLI starts. You should see the URL to run the functions as shown below.
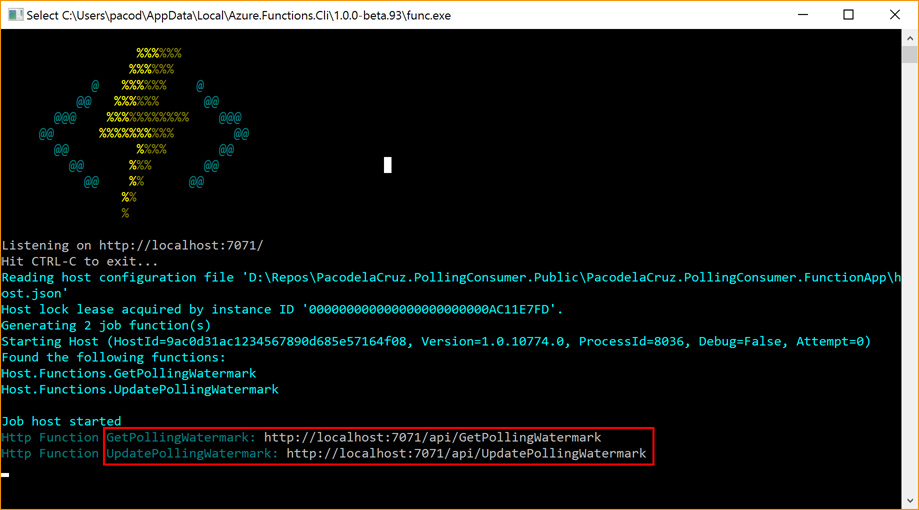
Once your project is running, you can then call the functions from PostMan by adding the corresponding query parameters. By calling the GetPollingWatermark function hosted locally, you should get the PollingWatermark, as previously set, as a JSON object.
[GET] http://localhost:7071/api/GetPollingWatermark?sourceSystem=HRSystem&entity=EmployeeNewHire

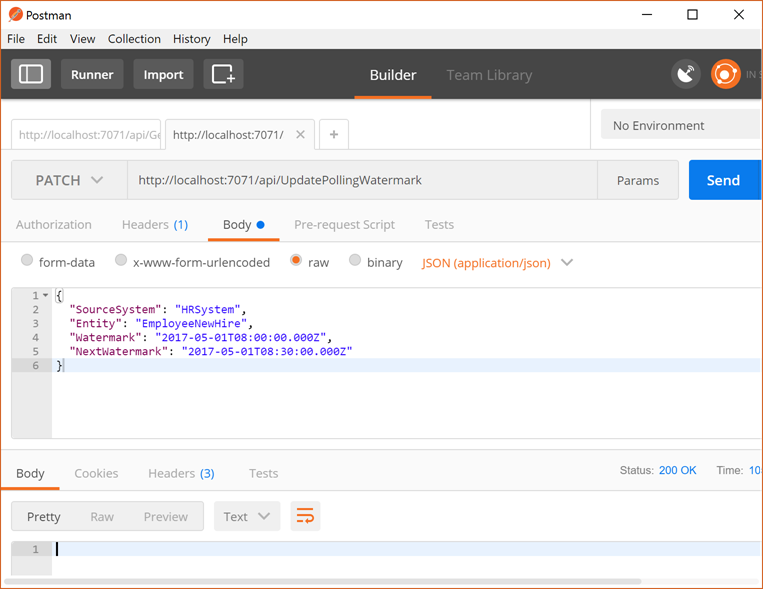
To call the UpdatePollingWatermark function you need to use the PATCH method, specify that the body is of type application/json, and add in the Request Body, as obtained in the previous call. After calling it, you should see that the PollingWatermark has been updated based on the sent value. So far so good :)
[PATCH] http://localhost:7071/api/UpdatePollingWatermark
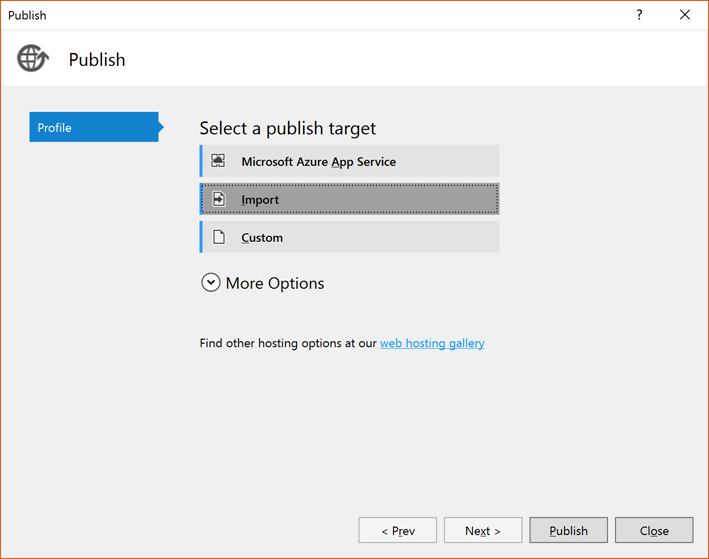
After having successfully tested both functions, we are ready to publish our Function App project. To do so, we have to right click on the project, and then click Publish. This will allow us to import the Publish Profile that we downloaded previously in one of the first steps described above.
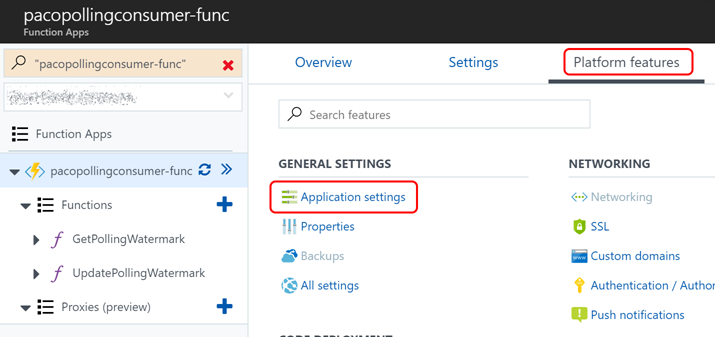
After having successfully published the Azure Function, now we need to configure the connection strings on the Azure Function app settings. You will need to add a new app setting called PollingWatermarkStorage and set the value to the connection string of the storage account containing the PollingWatermark table.
Now you should be able to test the functions hosted on Azure. You need to go to your Function App, navigate to the corresponding function, and get the function URL. As I set the authentication level to function, a function key will be contained in the URL.
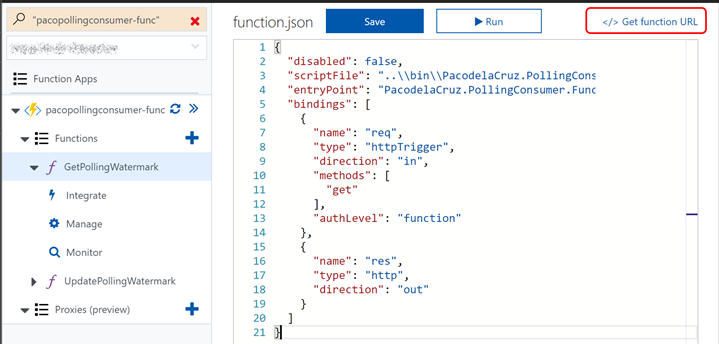
Bear in mind that we need to add the corresponding query params or request body. Your URLs should be something like:
[GET] https://pacopollingconsumer-func.azurewebsites.net/api/GetPollingWatermark?code=[functionKey]&SourceSystem=HRSystem&Entity=EmployeeNewHire
[PATCH] https://pacopollingconsumer-func.azurewebsites.net/api/UpdatePollingWatermark?code=[functionKey]
5. Develop the Logic App implementing the Polling Consumer workflow.
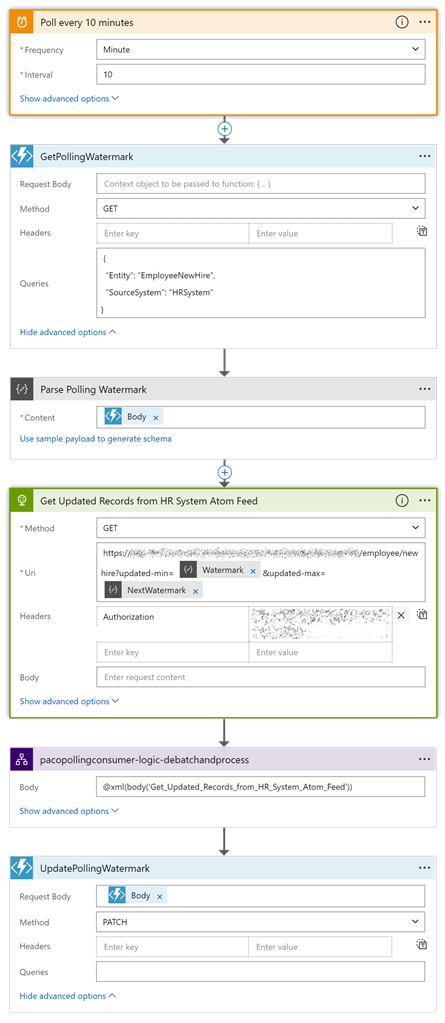
Now that we have implemented the required Azure Function, we are ready to build our Logic App. Below you can see the implemented workflow. I added the following steps:
- Recurrent trigger
- Function action, to call the GetPollingWatermark function with the GET method and passing the query parameters.
- Parse JSON to parse the response body.
- Http Request action to call the HR System endpoint passing the updated-min and updated-max parameters using the PollingWatermark and NextPollingWatermark properties of the parsed JSON.
- Call a nested Logic App. Because the Atom Feed is a batch of entries, on the nested Logic App, I will be implementing debatching using SplitOn. You can also use ForEach and send each entry to an Azure Service Bus queue or topic.
- Function action to update the polling watermark for the next poll by calling the UpdatePollingWatermark function with the PATCH method and passing as request body the response obtained from the previous function call.
In case it’s of help, you can have a look at the code view of the Logic App. Just bear in mind that I removed some sensitive information.
Other potential scenarios
Now that you have seen how I have implemented the custom Polling Consumer Patterns on Azure Logic Apps supported by Azure Functions and Azure Storage Tables, you should be able to implement the same pattern with slight variations for your own scenarios. You might need to use a numeric or a hash polling watermark, or instead of passing it to an API, you might need to pass it to a Function, that on its turn, queries a database for which a connector with a trigger is not yet available.
Conclusion
The Polling Consumer pattern is quite common in integration projects. Logic Apps provides different trigger connectors which implement the Polling Consumer pattern out-of-the-box. However, there are scenarios in which we need to connect to a system for which there is no trigger connector available yet. In these scenarios, we need to implement a custom Polling Consumer pattern. Through this post, we have seen how to implement a custom Polling Consumer Pattern using Azure Logic Apps together with Azure Functions and Azure Storage. To do so, we created an Azure Resource Group, we created an Azure Function, we developed Azure Functions using a C# class library project, we tested the functions locally, we deployed them to Azure, and configured and tested them on Azure as well. Finally, we developed a Logic App to implement the Polling Consumer pattern.
As discussed above, you can implement the same pattern with slight variations to accommodate your own scenarios with different requirements; and I really hope this post will make your implementation easier, faster, and more fun. Do you have any other ideas or suggestions on how to implement the custom Polling Consumer Pattern? Feel free to share them below J
I hope this has been of help, and happy clouding!
Cross-posted on Deloitte Engineering Blog Follow me on @pacodelacruz